Installation Guide 1.0.3
About this Guide
Audience
What's New
New in Version 1.0
Installation Requirements
Virtual Platform Requirements
Athena is distrubuted as a Virtual Machine via an OVF image. Concensus Technologies supports deploying the Athena VM on VMWare ESX v. 5 or VMWare Workstation v. 6.5 or newer.
Network Requirements
Athena requires that port 80 and 443 be open for inbound access from users. Port 4848 is required for inbound administrative access.
Also, ensure that the LDAP server's ports are accessible to the Athena server. This is usually port 636.
Web Browser Requirements
Athena supports the following browsers:
- Internet Explorer v. 10
- Chrome v. 28
- Firefox v. 24
- Safari v. 7
Installing Athena
Installation Checklist
Download the Virtual Appliance
Download the 1.0.3 release from Concensus Technologies
Import the OVF into VMWare ESX or VMWare Workstation
- Extract the Athena tar/gz file
- Locate and right-click on Athena.i636-0.0.1.ovf
- Select Open With VMWare Workstation from the context menu.
- Select Import and click OK
Running the Appliance for the First Time
- Power On the Athena 1.0.3 Virtual Machine
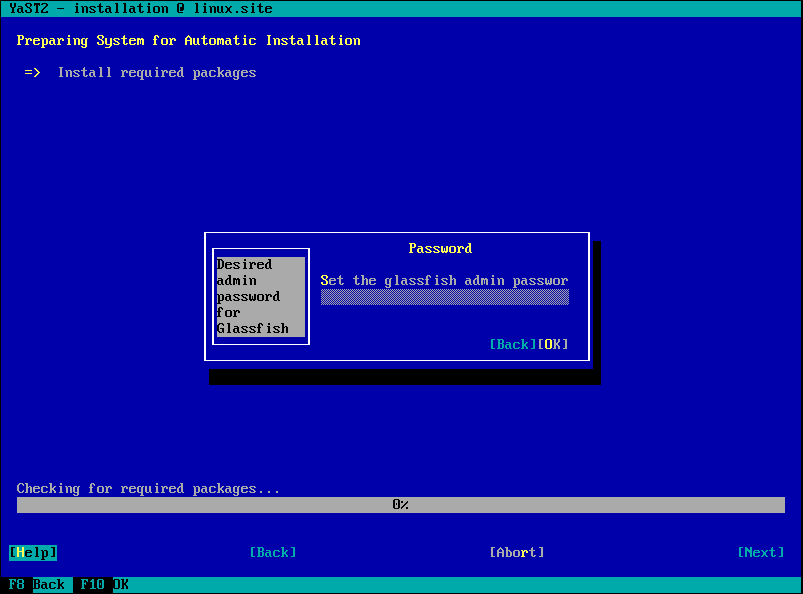
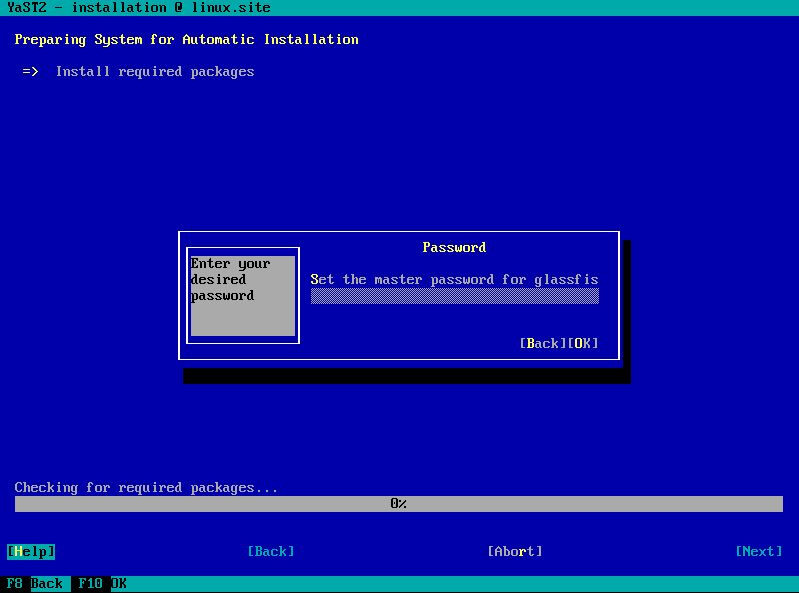
- The first time the appliance runs you will be asked to input two passwords.
- Glassfish Admin Password: the password for asadmin commands and the admin console:
- Glassfish Master Password: This password allows access to the keystores. This password is important if you want to upload your own SSL certificate to Glassfish:
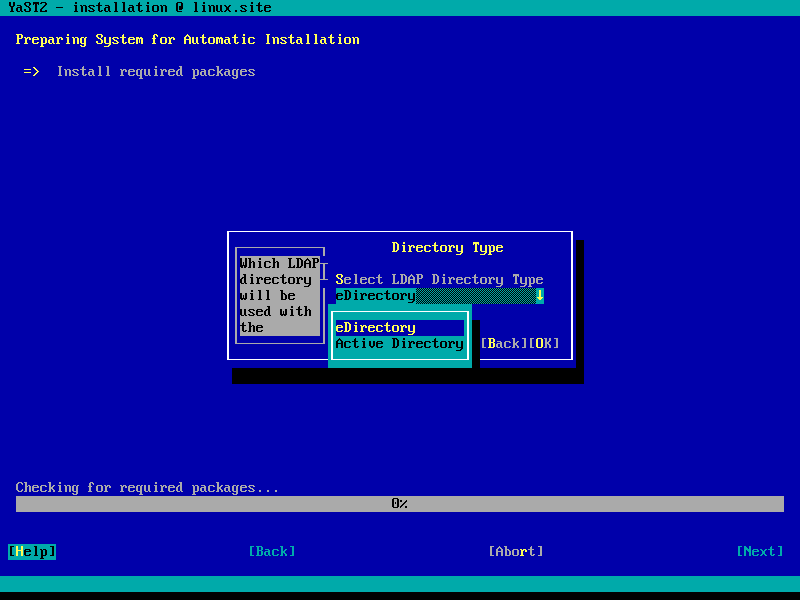
Select the directory type Athena will run against: eDirectory or Active Directory.
- Glassfish Admin Password: the password for asadmin commands and the admin console:
- Accept the License Agreement.
- Select Next
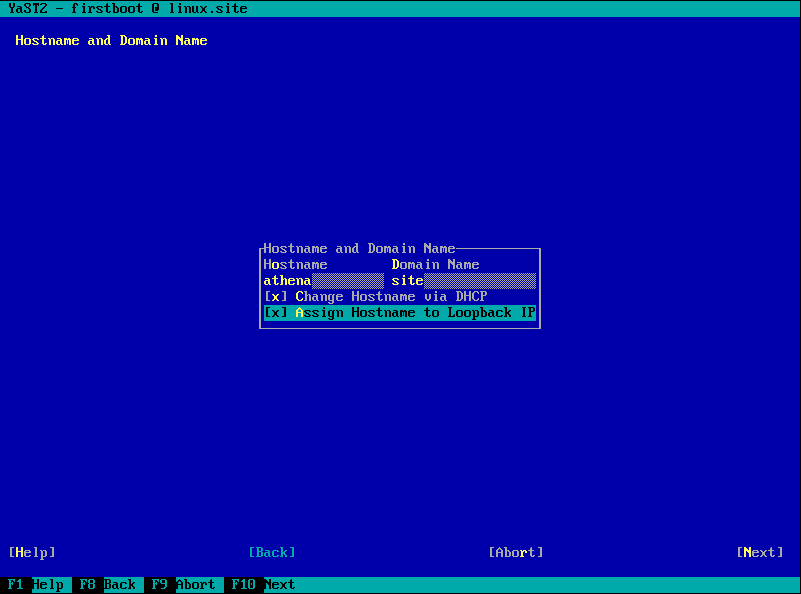
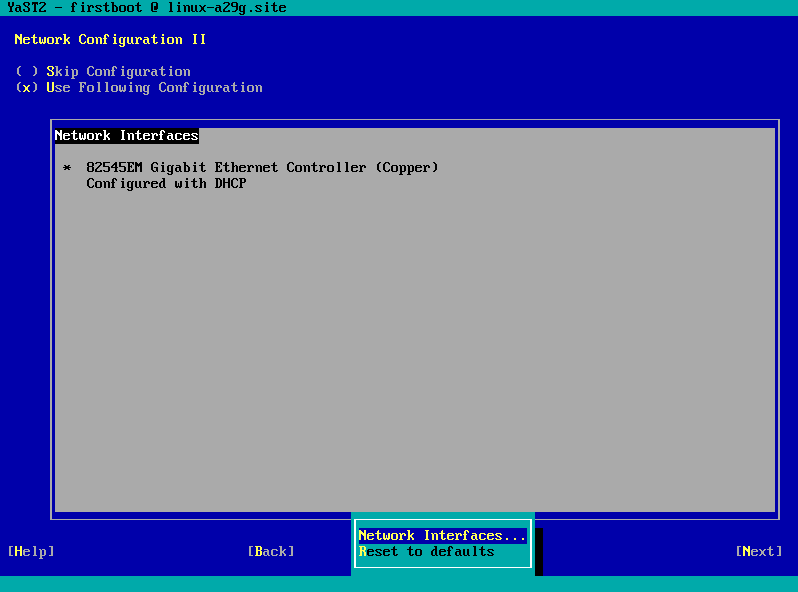
- Enter the Hostname and the Domain Name. On this screen, you must make sure Assign Hostname to Loopback IP is enabled. If DHCP is not a desirable option for you, the network will have to be configured at a later time.
- The Network Configuration II screen that comes up allows you to configure the network if you did not select DHCP.
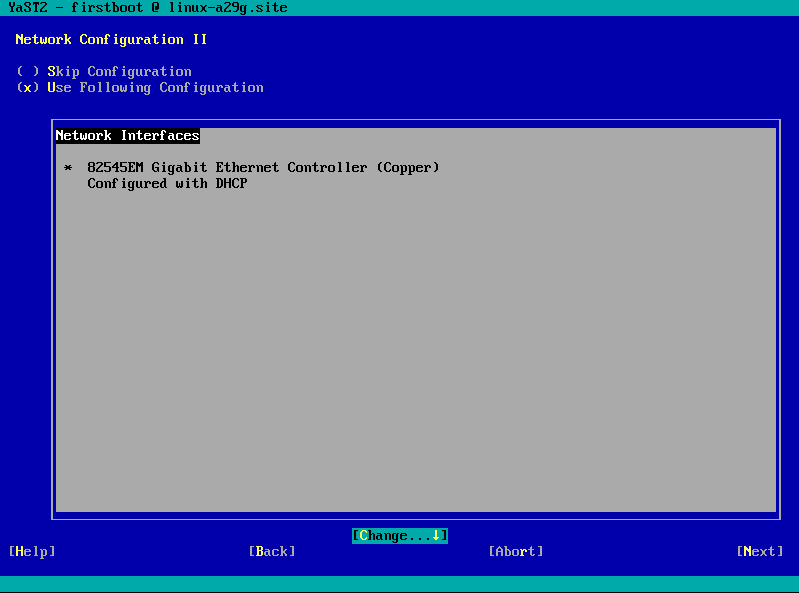
- In order to change the settings navigate to the Change option to select what you would like to change.
- The final step is logging into the box:
- Username: root
- Password: linux
- Athena will use these ports:
- 80 - HTTP connection
- 443 - HTTPS connection
- 4848 - Glassfish Admin Console
Post Installation Tasks
Configuring a JavaMail Session for Glassfish (Required for Account Sponsorship)
This step is required for use of the Account Sponsorship module. If this is not done, do not grant permission to the AS module.
- Open the Glassfish Management Console at https://server:4848
- Login as user root using the first password you defined when importing the Virtual Machine.
- Click on the side panel where it says "JavaMail Sessions"
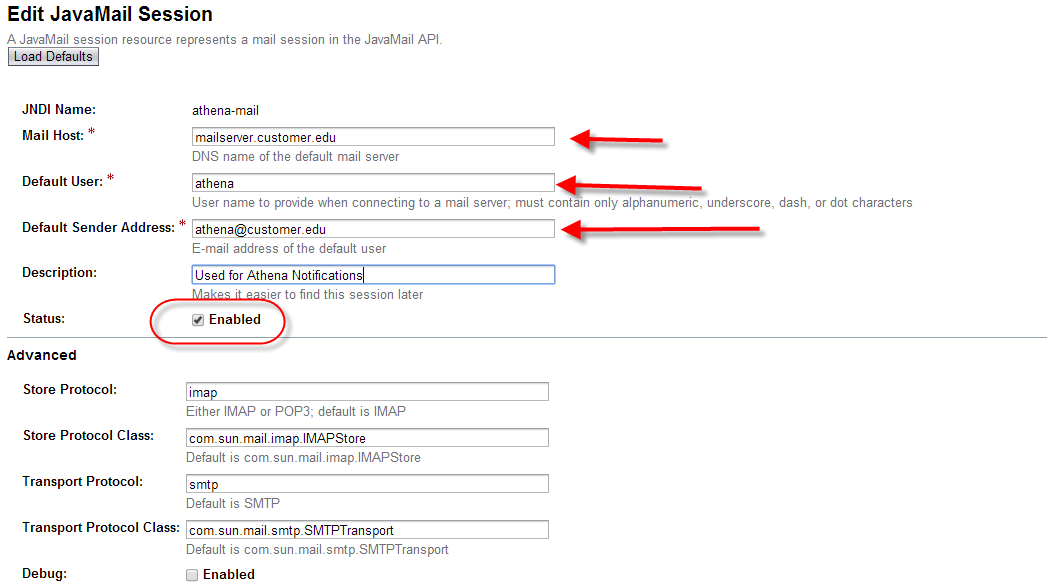
- Click New to create a new JavaMail Session
- The JNDI name MUST be "athena-mail". Consult the JavaMail Documentation: https://javamail.java.net/nonav/docs/api/ for details
- Fill out
- Mail Host: A mail server which Athena can use to send mail through
- Default User: the username to be used to log into the server
- Default Sender Address: the From address for the emails
- Description: optional
- Some of following properties may be required:
- mail.smtp.password: the password for the above mentioned default user, if authentication is used
- mail.smtp.socketFactory.fallback: set to false
- mail.smtp.host: set to the smtp address used for your mail server
- mail.smtp.port: set to the port for your SMTP server
- mail.smtp.auth: set to true if authentication is required
- mail.smtp.socketFactory.class: set to javax.net.ssl.SSLSocketFactory if your mail server requires SSL
- mail.smtp.socketFactory.port: set to the SSL port of your SMTP server, if required.
- See https://javamail.java.net/nonav/docs/api/ for details on these or other options which may be required for your configuration


Configure Glassfish To Use An SSL Certificate (Optional)
This is an optional step which is only necessary if you wish to replace the default certificate.
- Use Java Keytool to configure certificates
- Change the working directory to /home/glassfish/glassfish3/glassfish/domains/athena/config
- Generate a private key into keystore.jks
keytool –keystore keystore.jks –genkey –alias client
Note
The keystore password is the same as Glassfish Master Password
- Generate a certificate request
keytool –keystore keystore.jks –certreq –alias client –keyalg rsa –file client.csr
- Sign the certificates using the "client.csr" file
- Receive root/intermediary certificates, and signed certificate
- Import the root/intermediary certificate into keystore.jks
keytool -import -keystore keystore.jks -file ca-certificate.pem.txt -alias root
- Import the signed certificate into keystore ,jks
keytool –import –keystore clientkeystore –file client.cer –alias client
- Configure Glassfish to use the newly created signed certificate instead of the glassfish default (s1as)
- Go to the glassfish admin console (port 4848)
- Login using the Glassfish admin password
- On the side panel select "Default Config"
- Select "Network Listeners"
- Select "http-listener-2"
- On the main panel of the screen, you see tabs "General", "SSL", "HTTP", and "File Cache"
- Click on the "SSL" tab
- Change the certificate nickname from s1as to your certificate's name:
- Restart the Glassfish server through the command line:
- Type the command:
- /etc/init.d/GlassFish_athena restart
Configure Backup (Optional)
It is recommended that the Athena Virtual Machine be backed up using the same scheme and system used for your other Virtual Machines.Configure Athena (Required)
- Follow the steps outlined in Administration Guide 1.0.3
Appendix A - Troubleshooting